Setting up a gaming headset with your PC might seem daunting at first, but with the right approach, it becomes a straightforward task that opens the door to immersive audio experiences. Whether you are using a wired, USB, or Bluetooth model, understanding the connection process and configuring your system correctly ensures you get the most out of your gaming headphones. With numerous options available from brands such as Sony, Bose, Razer, Sennheiser, and Audeze, selecting the right device and optimising its performance can significantly enhance your gameplay and communication clarity.
Choosing and Connecting Your Gaming Headset to Your PC
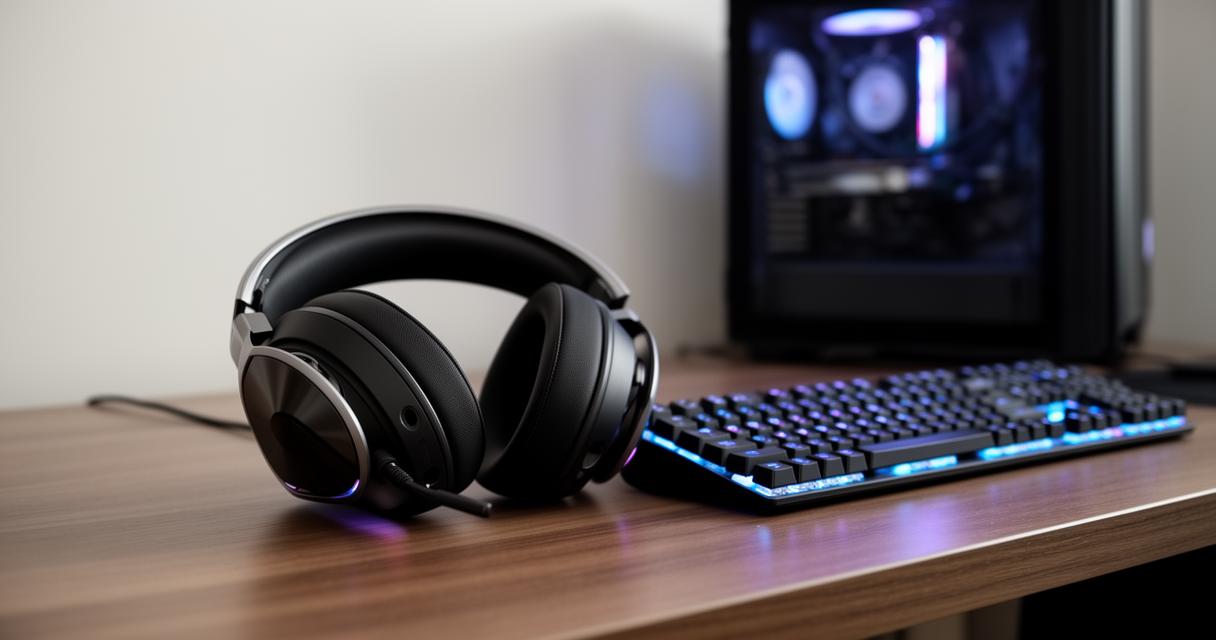
Before diving into the connection process, it is essential to confirm that your gaming headset is compatible with your PC. Modern gaming headphones come in various forms, including wired models with standard jacks, USB headsets, and wireless earbuds or over-ear designs that rely on Bluetooth connectivity. Each type has its own advantages, and understanding these differences helps you make an informed choice. Wired headphones typically offer low latency and consistent audio quality, making them a favourite among competitive gamers. USB headsets, on the other hand, provide plug-and-play convenience and often include built-in sound cards for enhanced audio processing. Wireless gaming options, such as those from Razer or Audeze, deliver freedom of movement and are increasingly popular for their versatility.
Understanding compatibility: usb, wired, and bluetooth headsets
Compatibility is the cornerstone of a successful setup. Wired headsets generally use a 3.5mm audio jack, which is present on most desktop and laptop computers. Some gaming headphones feature separate jacks for audio output and microphone input, requiring a splitter or adapter if your PC has a single combo port. USB gaming headphones connect directly to a USB port and are recognised by the operating system almost instantly, often without the need for additional drivers. Bluetooth headsets, including wireless earbuds from brands like Sony, Bose, and Apple, require your PC to have Bluetooth capability. Most modern computers come equipped with this feature, but older models may need an external Bluetooth adapter. It is worth noting that wireless gaming headsets can sometimes introduce slight latency, although premium models such as the Razer BlackShark V3 Pro and Audeze Maxwell 2 are designed to minimise this issue.
Step-by-step connection process for each headset type
Connecting a wired headset is as simple as identifying the correct port on your computer and plugging in the cable. If your gaming headphones have a single 3.5mm connector, insert it into the headphone jack, which is usually colour-coded green. For headsets with separate audio and microphone plugs, ensure each is connected to the corresponding port, often marked with headphone and microphone icons. USB headsets are even more straightforward: simply plug the USB connector into an available port, and your operating system should automatically detect and install the necessary drivers. For Bluetooth models, the process begins by ensuring your headset is charged and switched into pairing mode, which is typically indicated by a flashing light. On your PC, navigate to the Bluetooth settings, usually found in the system settings menu, and select your headset from the list of available devices. Once paired, your wireless gaming headset should connect automatically whenever it is within range and powered on.
Configuring Audio and Microphone Settings for Optimal Performance
After successfully connecting your gaming headset, the next step is to configure your PC's audio settings to ensure the headset is recognised as the default device for both output and input. This step is crucial for directing game audio, voice chat, and other sounds through your headphones, as well as enabling your microphone for communication during online matches. Windows and other operating systems provide intuitive interfaces for managing these settings, allowing you to test and adjust audio levels to suit your preferences.

Setting Your Headset as the Default Audio Output and Input Device
To set your gaming headset as the default audio device, open the sound settings on your PC by right-clicking the speaker icon in the system tray and selecting the appropriate option. Within the sound settings menu, you will find sections for output and input devices. Choose your headset from the list of available output devices to ensure that all audio, including game sound effects and music, is routed through your headphones. Similarly, if your headset includes a microphone, select it from the input device list to enable voice communication. For USB and Bluetooth headsets, the device name will typically include the brand or model, such as Sony WH-1000XM6 or Bose QuietComfort Ultra. It is advisable to disable or mute other audio devices during gaming sessions to prevent any confusion or audio conflicts.
Testing sound quality and microphone functionality
Once your headset is set as the default device, it is important to test both the audio output and microphone input to confirm everything is functioning correctly. Play a piece of music or a game trailer to check the sound quality, paying attention to clarity, bass response, and overall balance. High-quality gaming headphones from manufacturers such as Sennheiser, Technics, and Bowers & Wilkins are known for delivering rich, detailed audio that can significantly enhance your gaming experience. To test the microphone, use the built-in recording feature in your operating system or a voice chat application. Speak clearly into the microphone and listen to the playback to ensure your voice is captured without distortion or background noise. Many gaming headphones, particularly those with noise cancelling features, are designed to filter out ambient sounds, providing clear communication even in noisy environments. If you encounter any issues, check the volume levels and ensure the microphone is not muted in the system settings.
Fine-Tuning Your Setup for the Ultimate Gaming Experience
With your headset connected and configured, the final stage involves fine-tuning various settings to maximise audio performance and comfort during extended gaming sessions. This includes reducing latency, adjusting equaliser settings if available, and managing battery life for wireless models. These optimisations ensure that your gaming headphones deliver the best possible experience, whether you are playing fast-paced shooters, immersive role-playing games, or engaging in competitive online matches.
Reducing Latency and Enhancing Audio Quality in Games
Latency can be a critical factor in gaming, particularly in competitive scenarios where split-second reactions are essential. Wired headphones naturally offer the lowest latency, making them a preferred choice for professional gamers. However, modern wireless gaming headsets, such as the Razer BlackShark V3 Pro and Audeze Maxwell 2, incorporate advanced technologies to minimise delay, ensuring that audio cues are delivered in real time. To further reduce latency with Bluetooth headsets, consider using a dedicated gaming mode if your device supports it, or switch to a wired connection when precision is paramount. Enhancing audio quality often involves adjusting the equaliser settings within your game or through dedicated software provided by the headset manufacturer. Many brands, including Sony, Bose, and Sennheiser, offer companion apps that allow you to customise sound profiles, boost bass for explosions, or enhance treble for clearer dialogue. Experimenting with these settings can help you find the perfect balance that suits your gaming style and preferences.
Managing Battery Life and Using Adapters for Seamless Compatibility
For wireless gaming headsets and wireless earbuds, battery life is a key consideration. Before starting a gaming session, ensure your headset is fully charged to avoid interruptions. Most modern models, such as the Sony WF-1000XM6 and Bose QuietComfort Ultra, offer several hours of continuous use, but it is wise to monitor the battery indicator regularly. Some headsets feature quick-charge capabilities, providing a few hours of use from just a short charging session. If your headset does not have sufficient battery life, consider using a wired connection as a backup option. Additionally, adapters can be invaluable for ensuring compatibility with different port types. For instance, if your PC lacks a 3.5mm jack, a USB audio adapter can bridge the gap, while older Bluetooth versions may benefit from a newer external Bluetooth dongle to improve connection stability and range. These small investments can make a significant difference in maintaining a seamless and enjoyable gaming experience.